Set up VPN connection
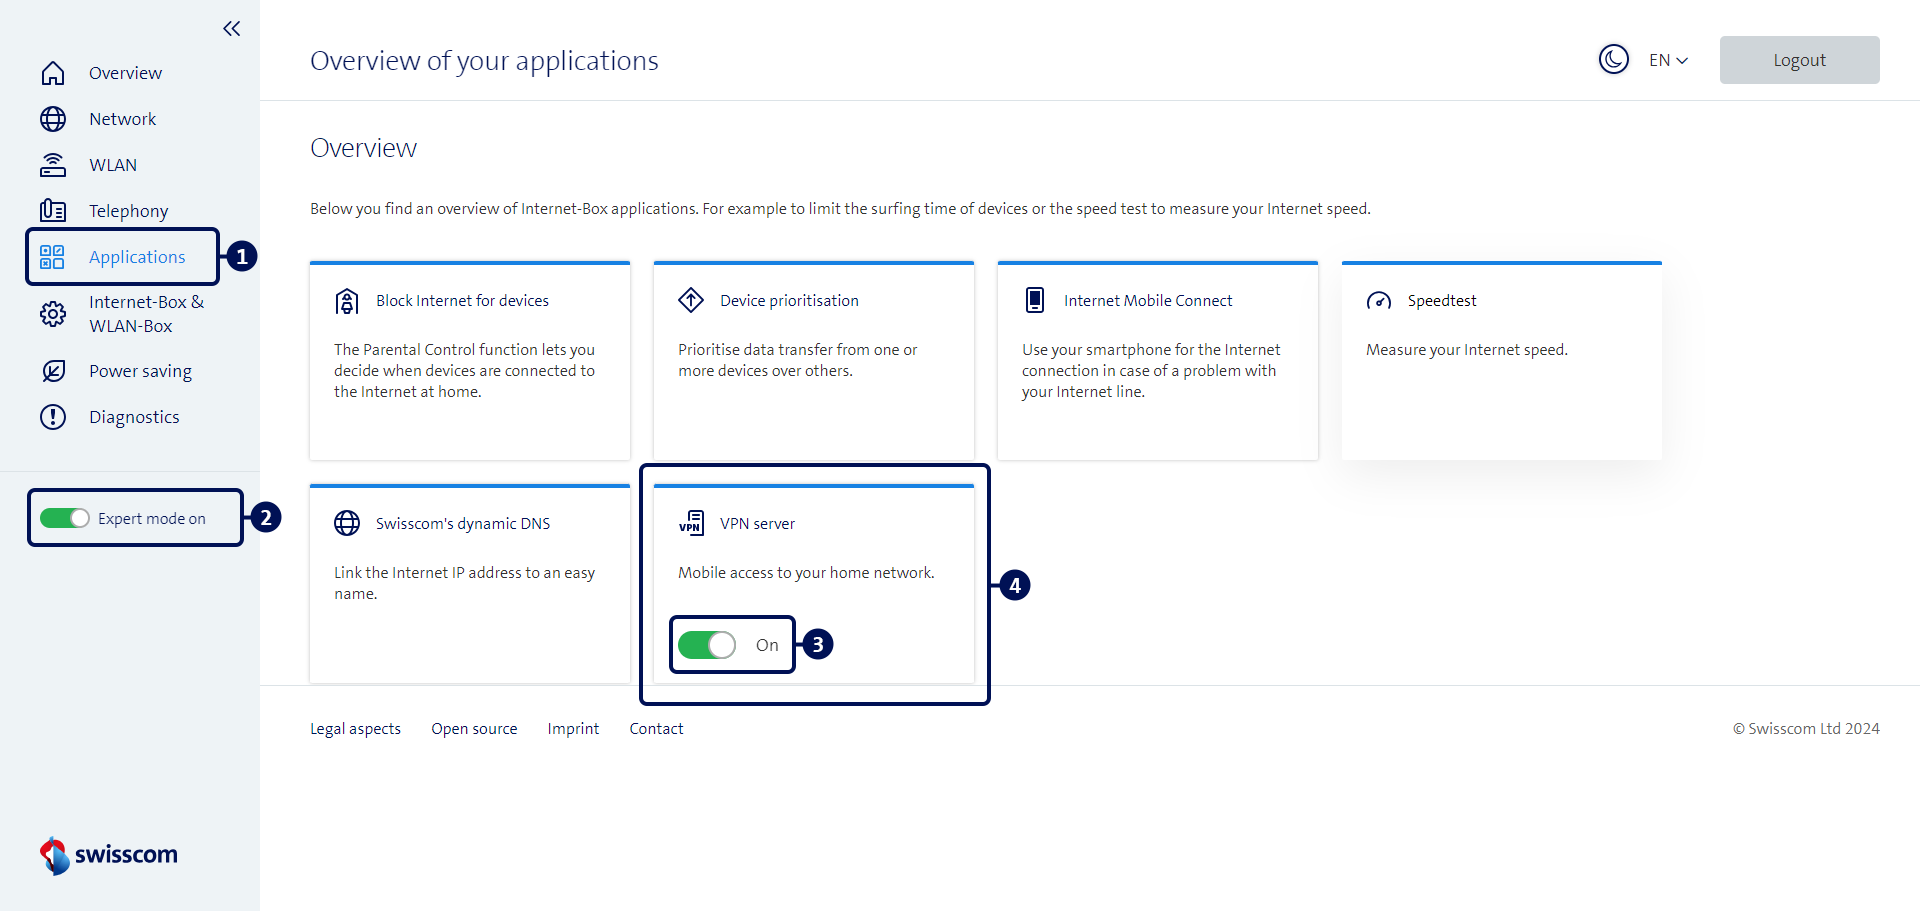
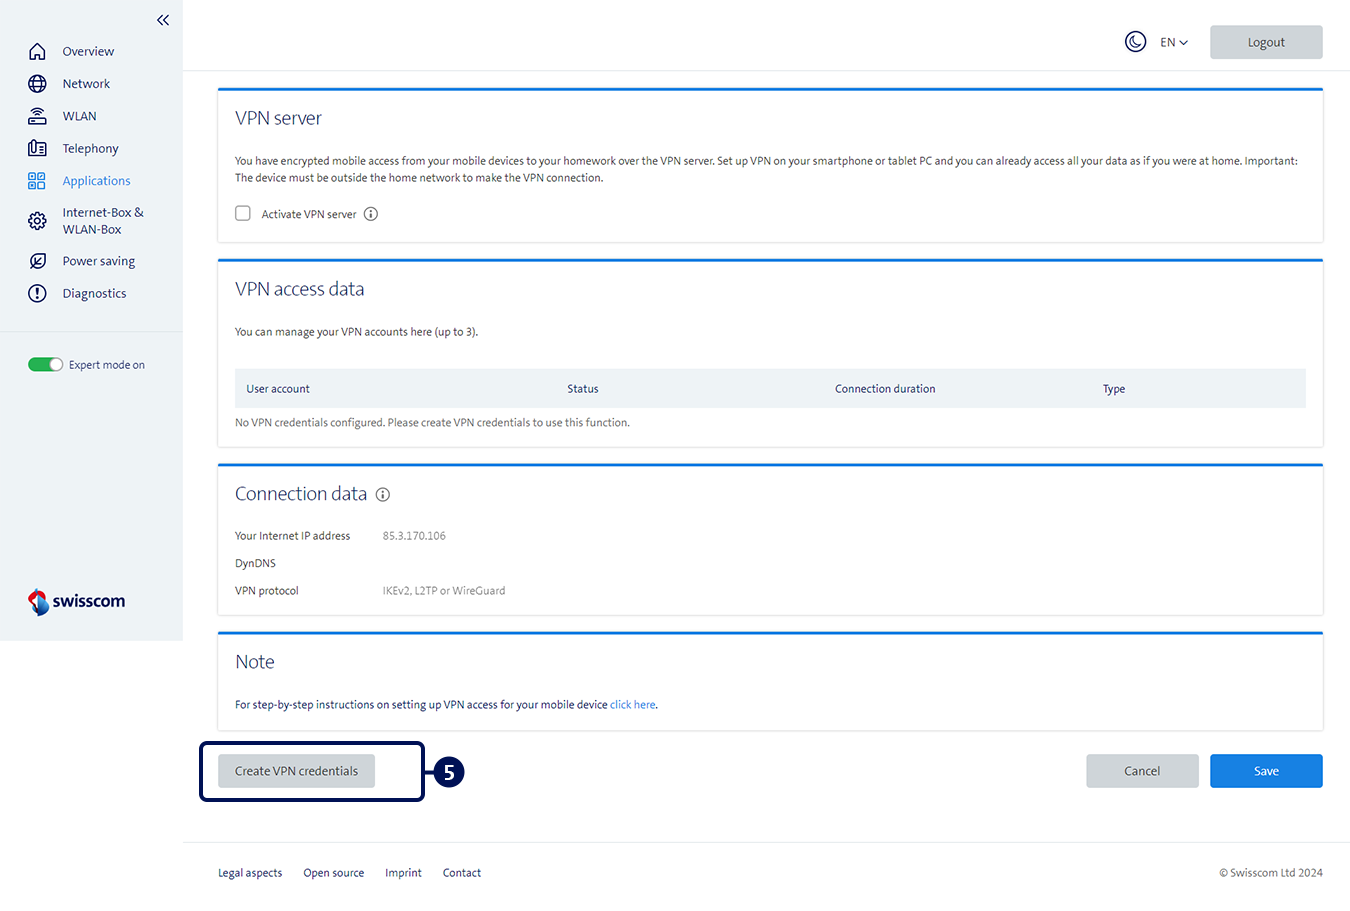
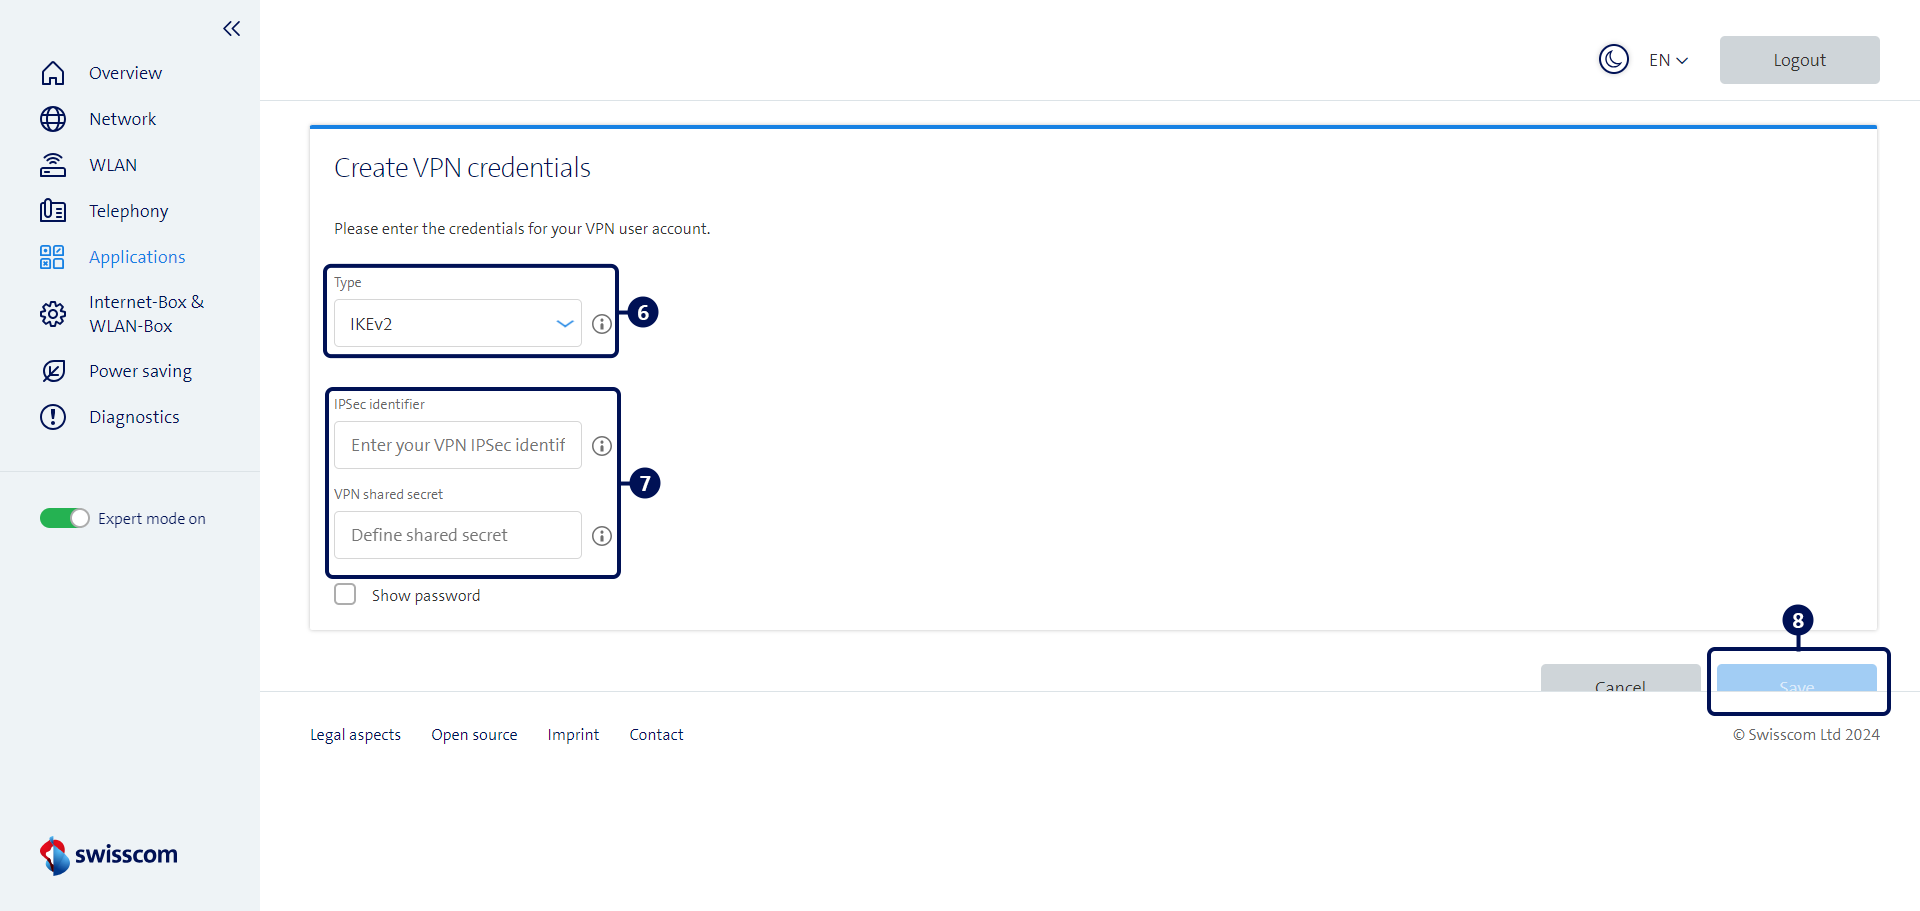
Activating routers for VPN
A VPN (Virtual Private Network) protects your data and privacy. It encrypts your Internet traffic and hides your IP address. This allows you to use the Internet securely and anonymously, including on public WLAN networks.
You can use various VPN types with the Swisscom Internet-Box:
- WireGuard: fast and modern
- L2TP/IPsec: widely used
- IKEv2: stable when changing network
One-time router activation
Setting up VPN on iOS
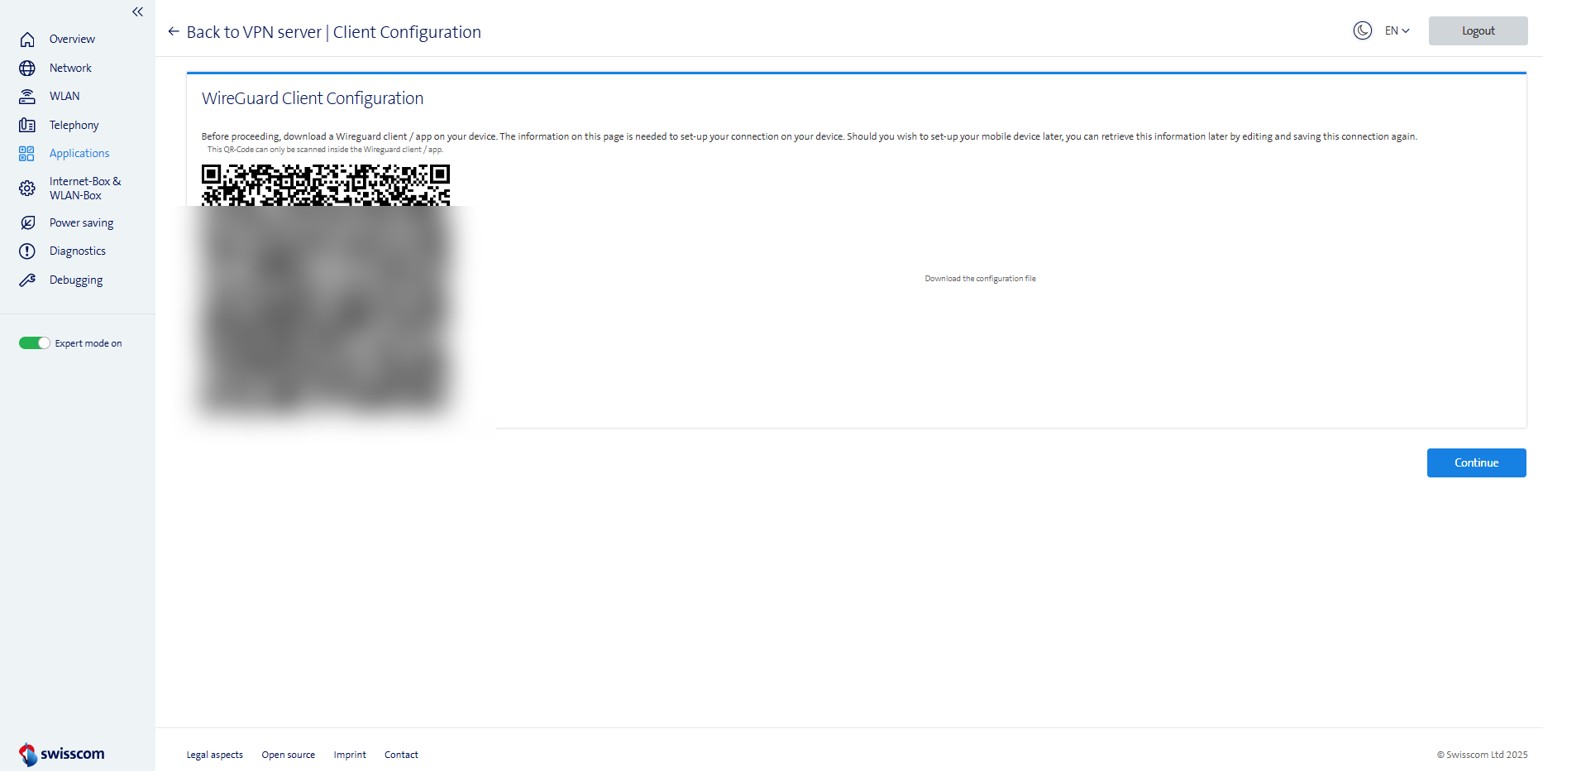
Setting up WireGuard
Our recommendation
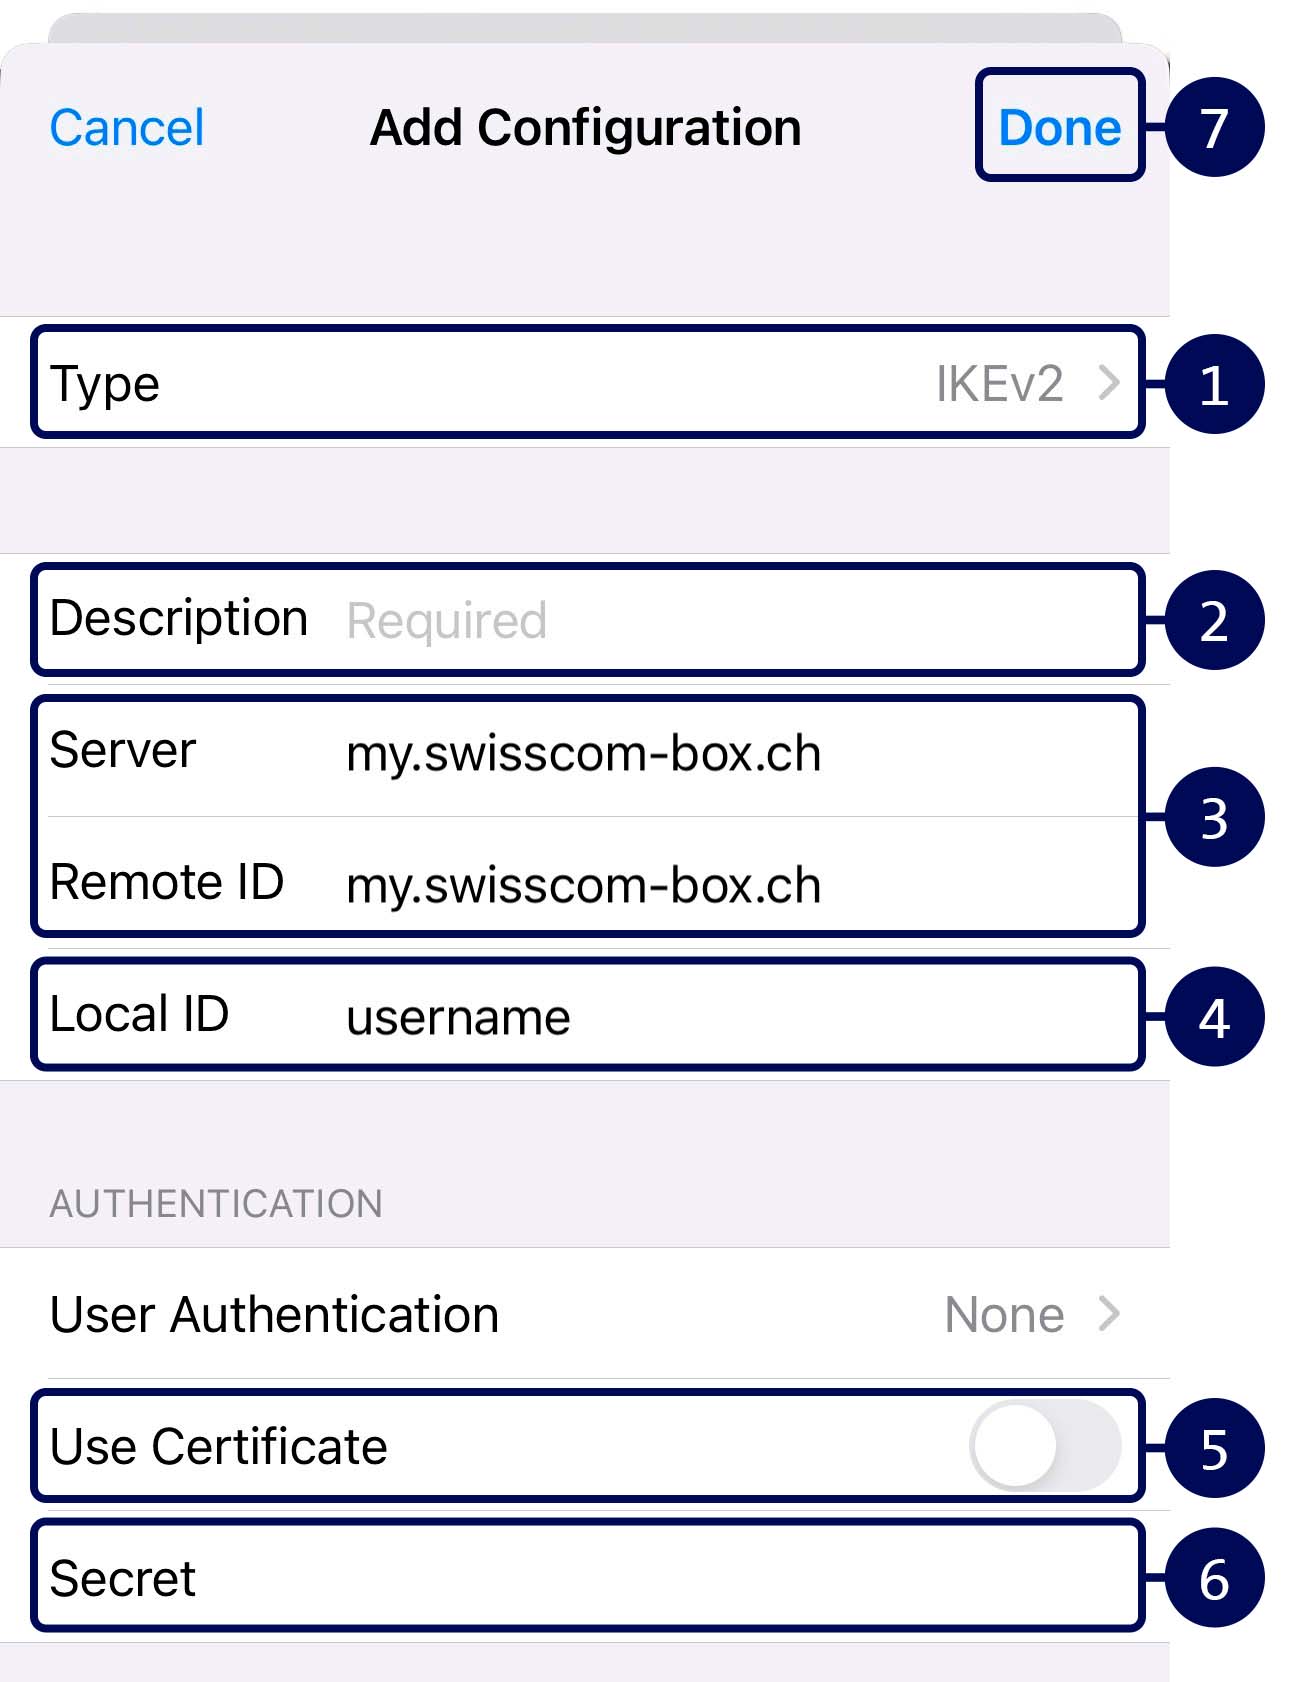
Set up IKEv2
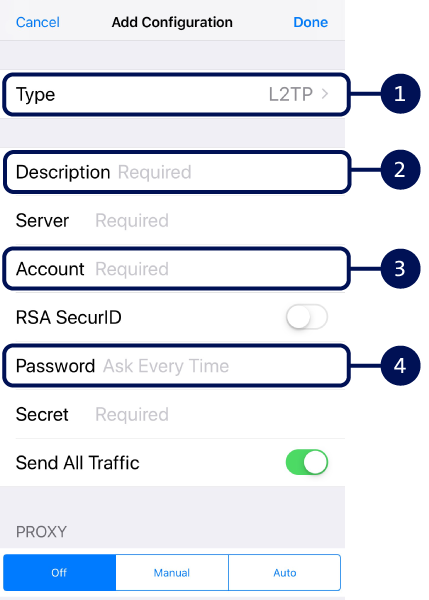
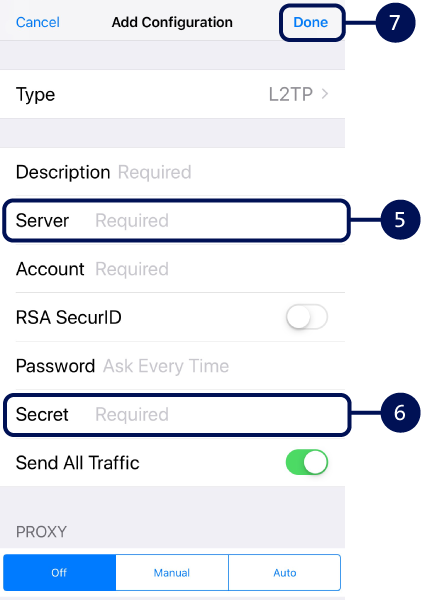
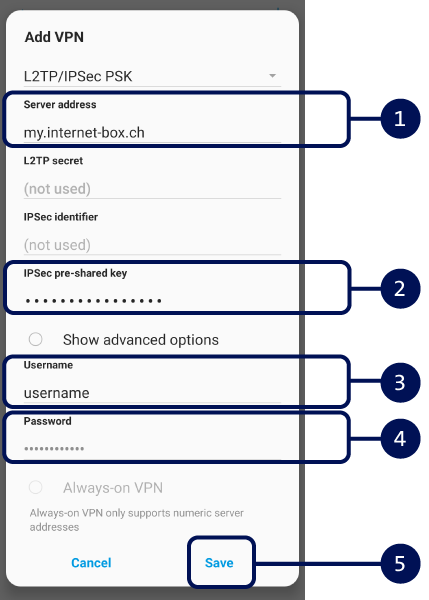
Set up L2TP
Setting up VPN on Android
Setting up WireGuard
Our recommendation
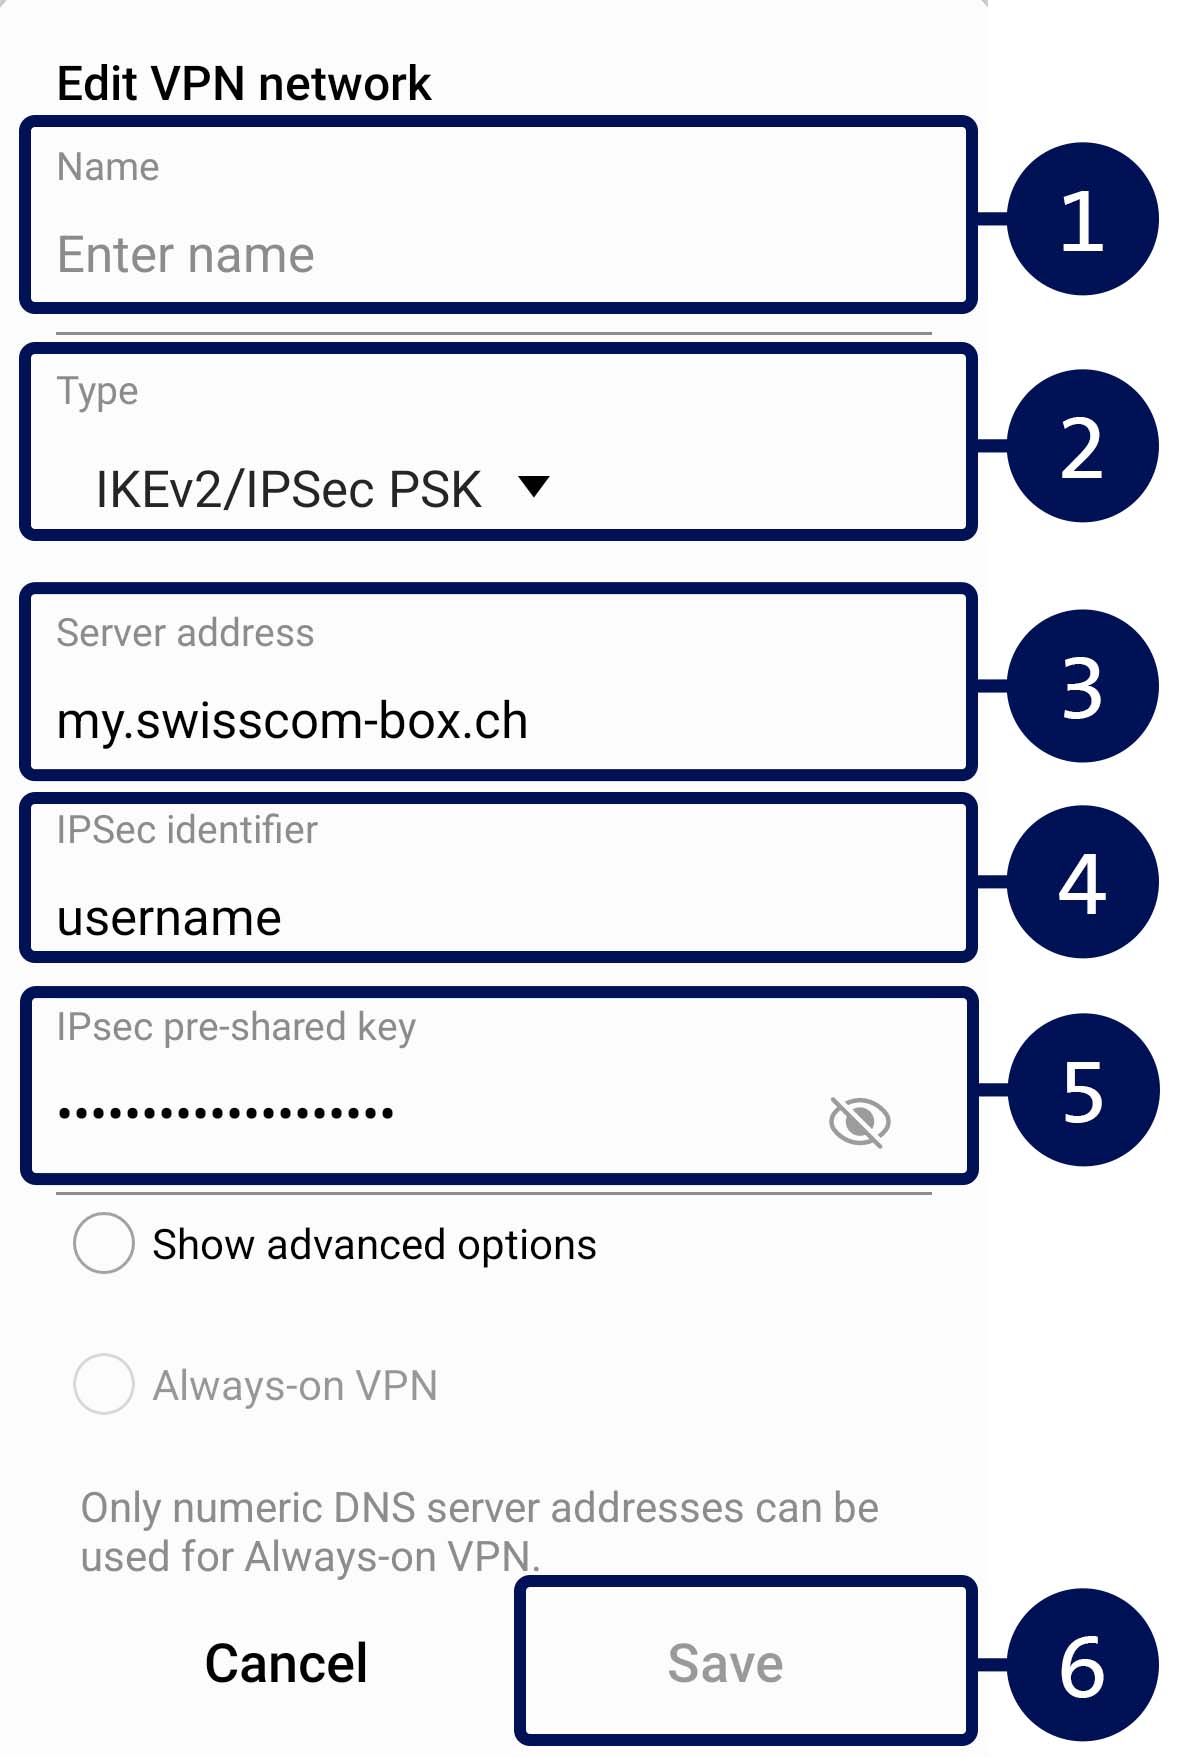
Set up IKEv2
Set up L2TP
Setting up VPN on Mac
Setting up WireGuard
Our recommendation
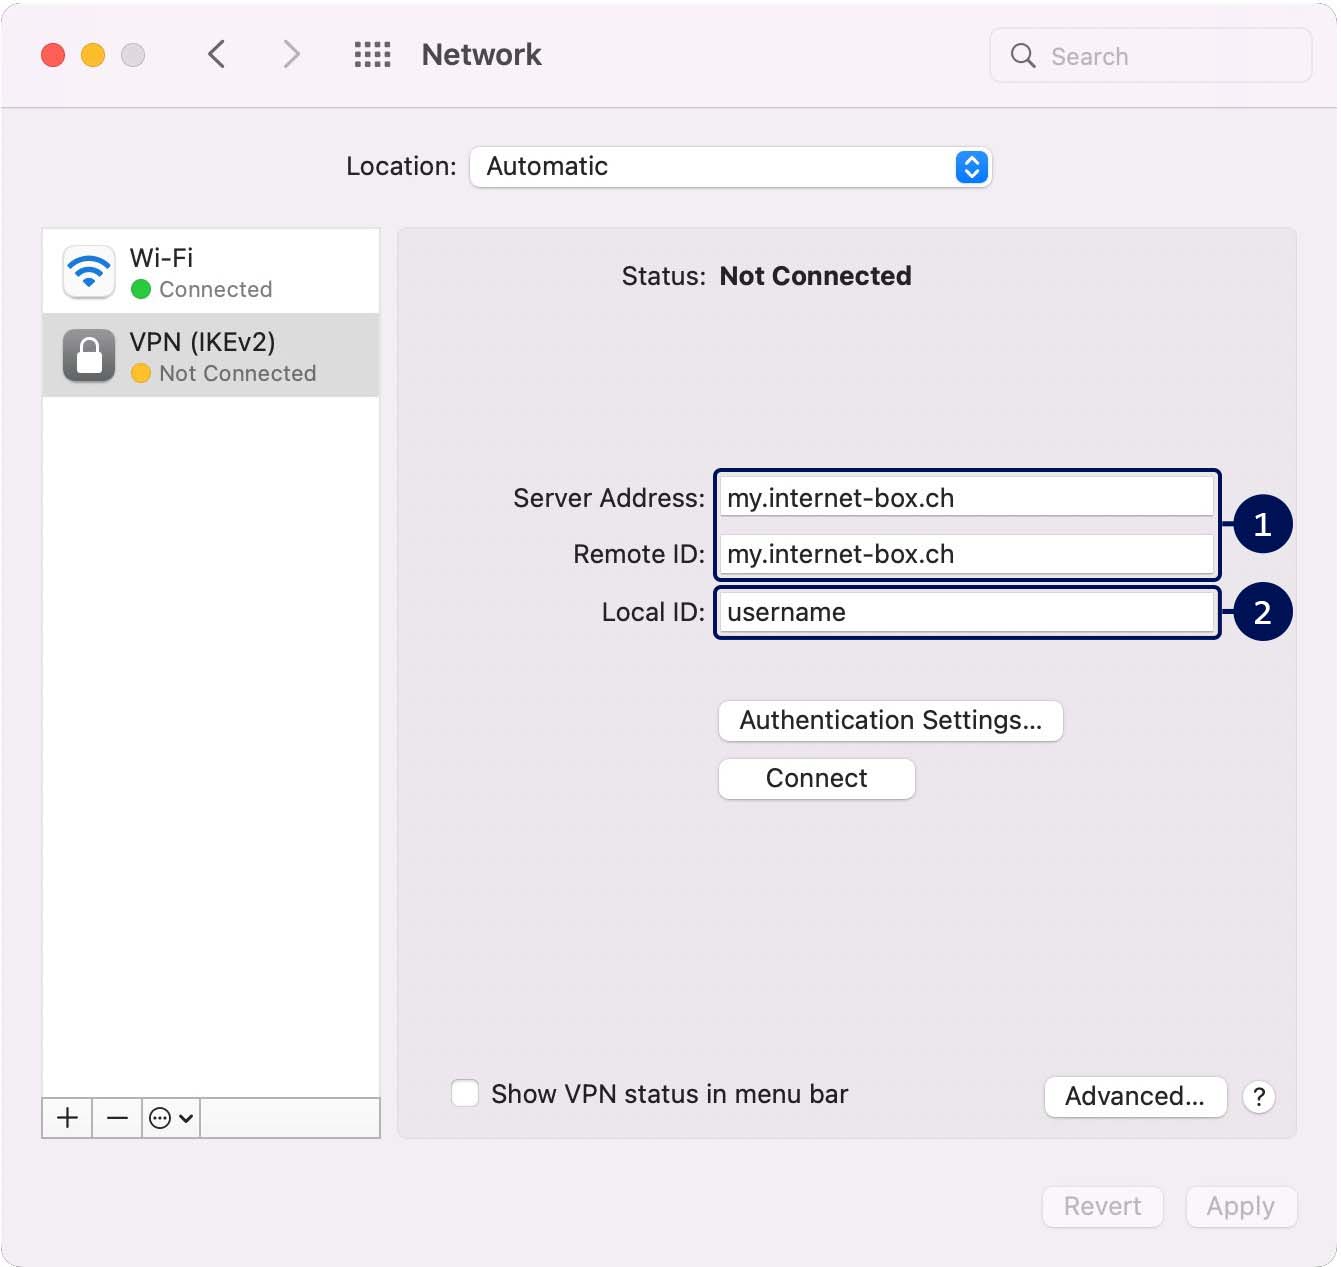
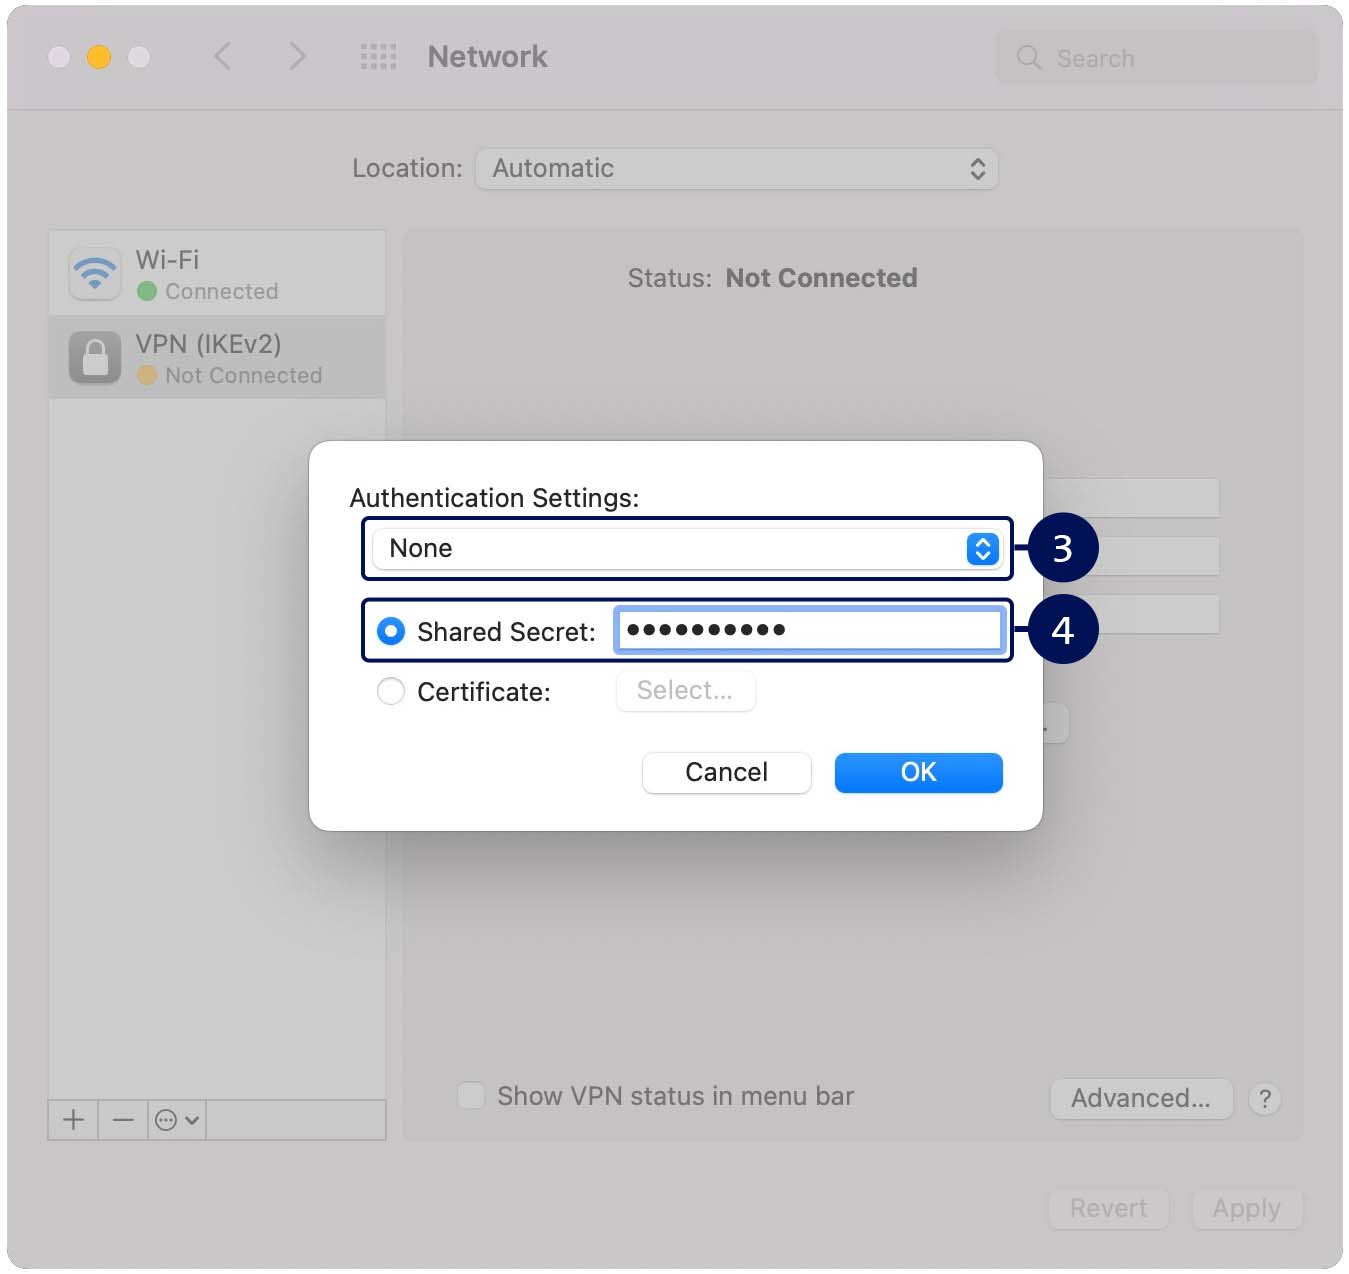
Set up IKEv2
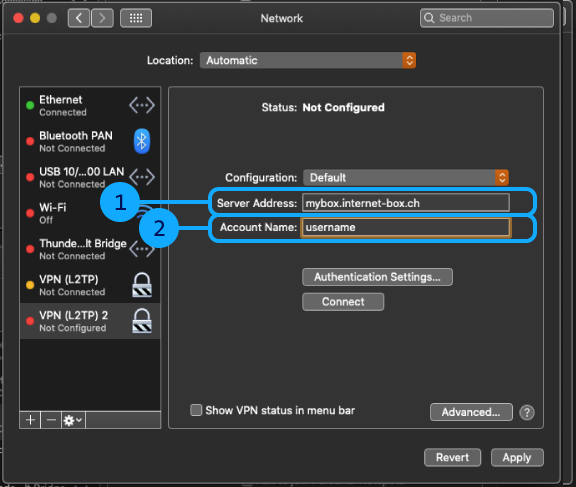
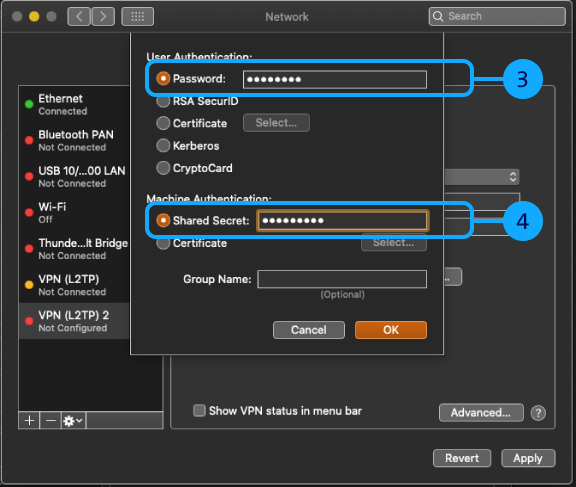
Set up L2TP
Setting up VPN on Windows
Setting up WireGuard
Our recommendation
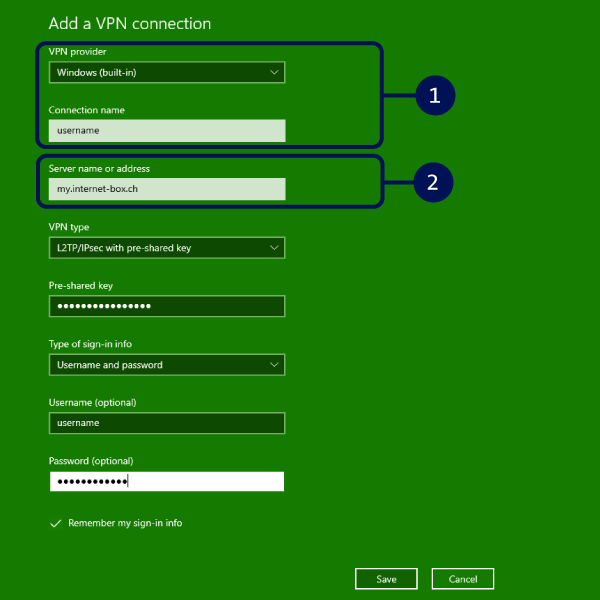
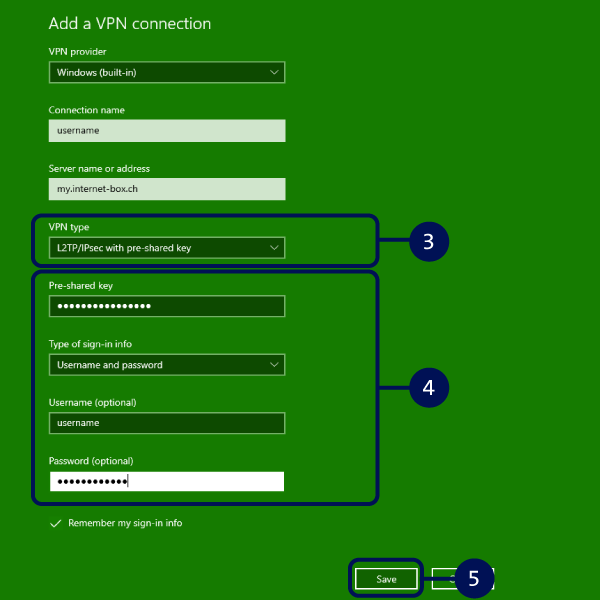
Set up L2TP for Windows 10
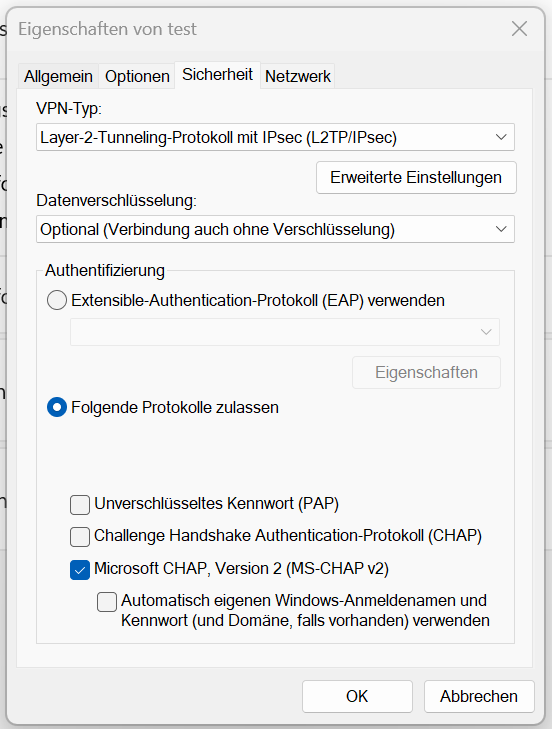
Set up L2TP for Windows 11
FAQs
Why doesn’t the VPN connection work at home?
How many simultaneous VPN connections are possible?
How does the VPN connection work in the long term?
Which VPN and Internet-Boxes are compatible?
Get support
Möchten Sie etwas bestellen? Wir beraten Sie
Manage your Swisscom products and services in your personal account.
Open My Swisscom(opens a new window)
Chatbot Sam helps you instantly, any time. If Sam can't help, a Swisscom employee will take over.
Start ChatDidn't find what you were looking for?
Get personal help from experienced Swisscom customers.
To the Community